
使用云湖开放API部署云湖邮局
 牢鼠 发布于
2024-12-02 18:43:22
牢鼠 发布于
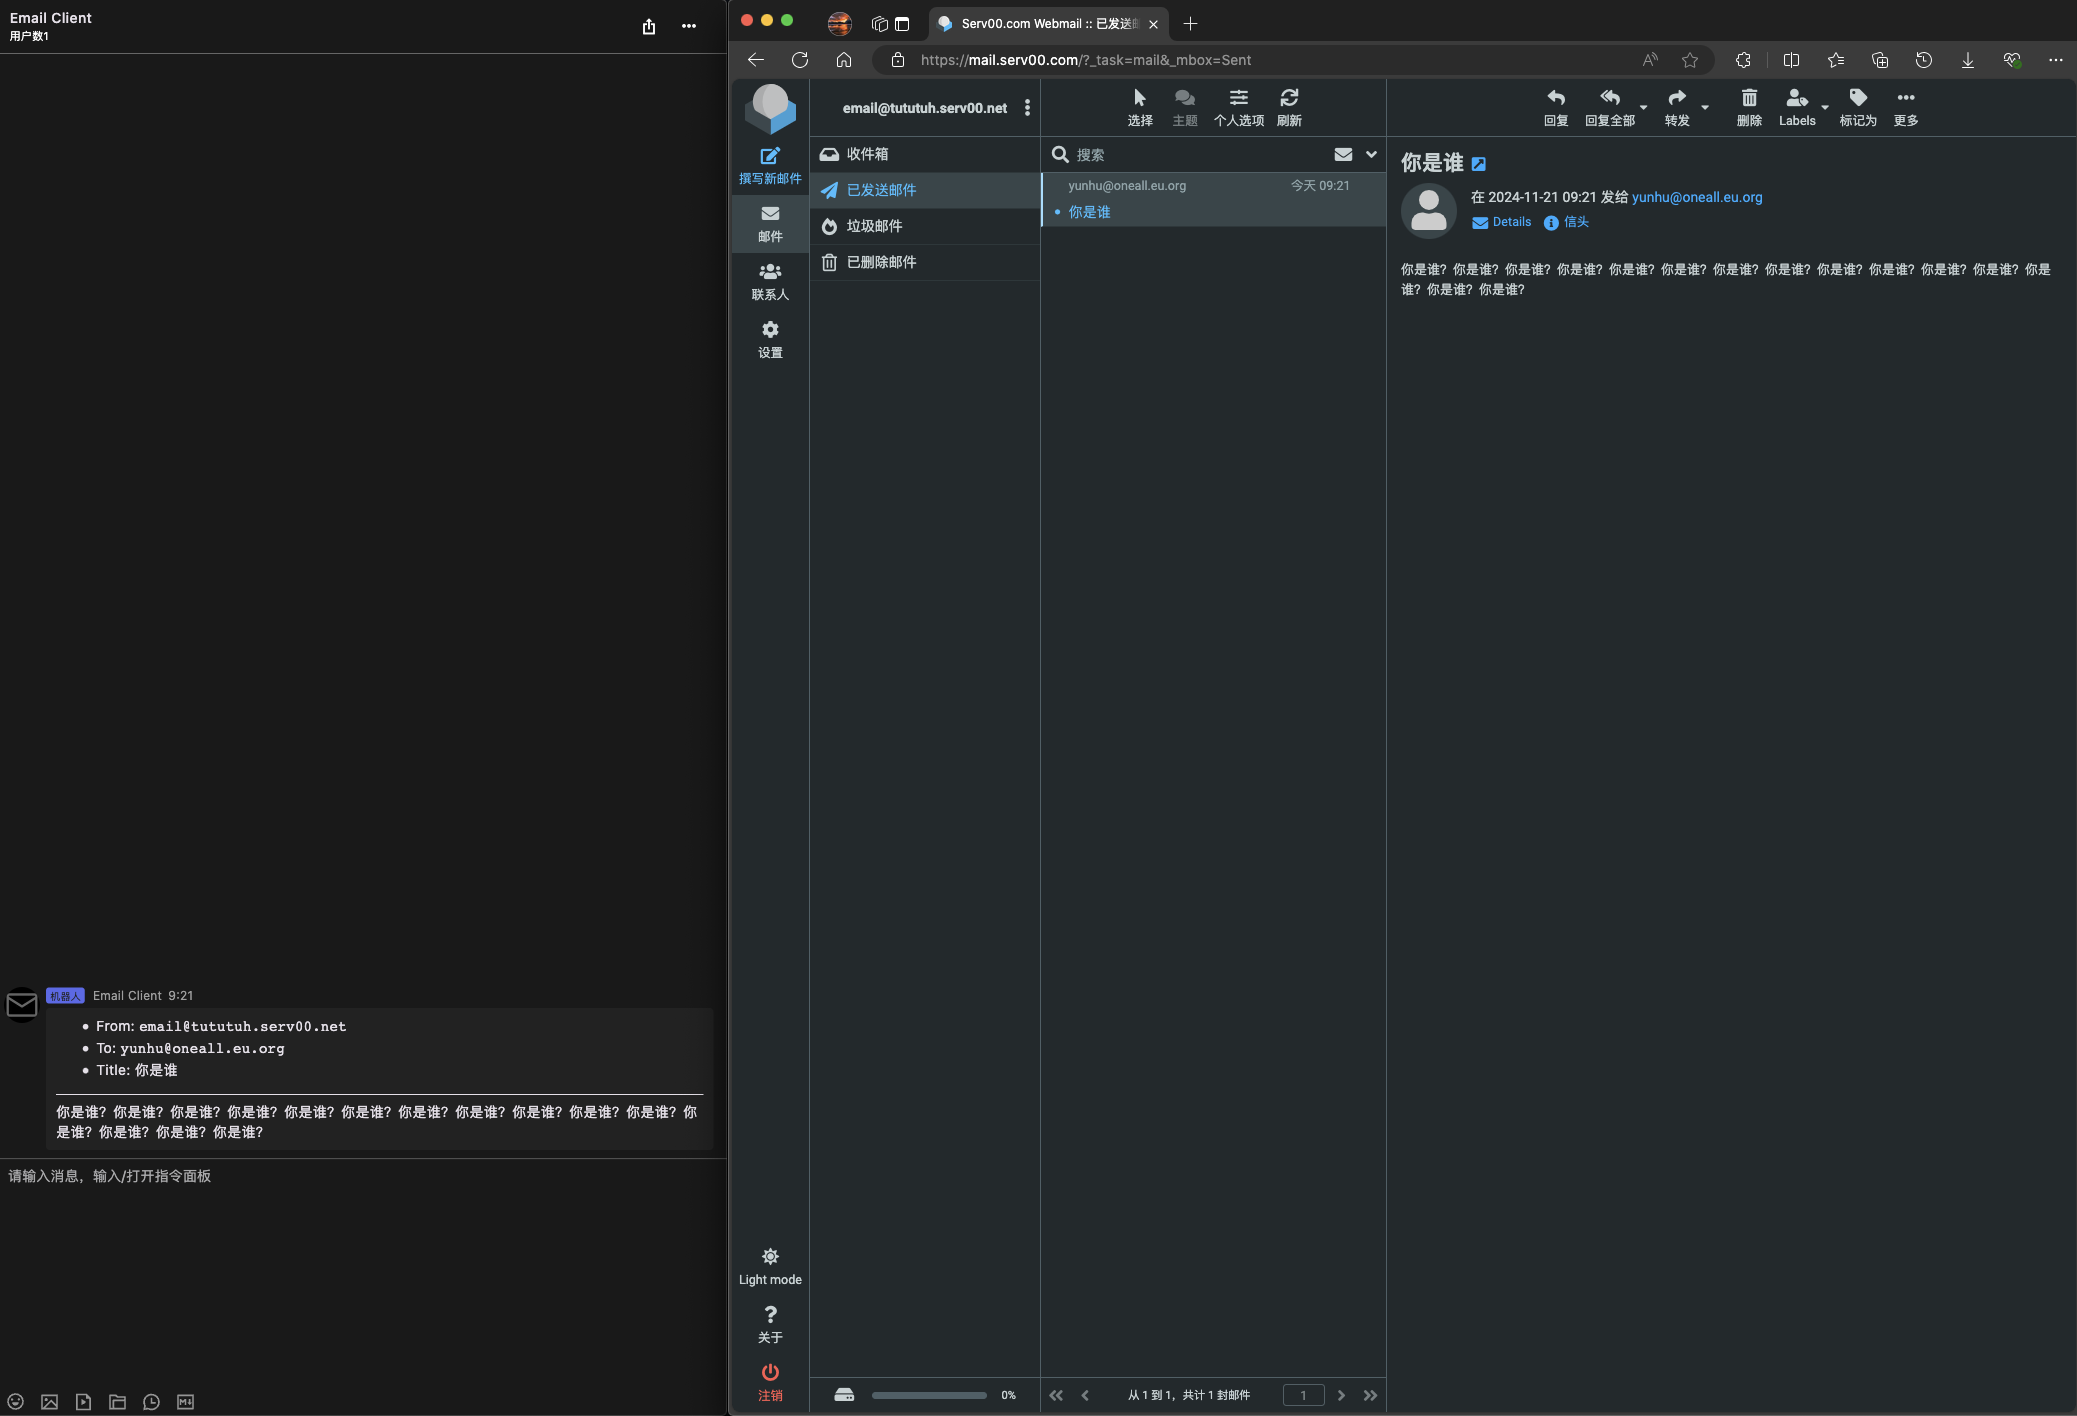
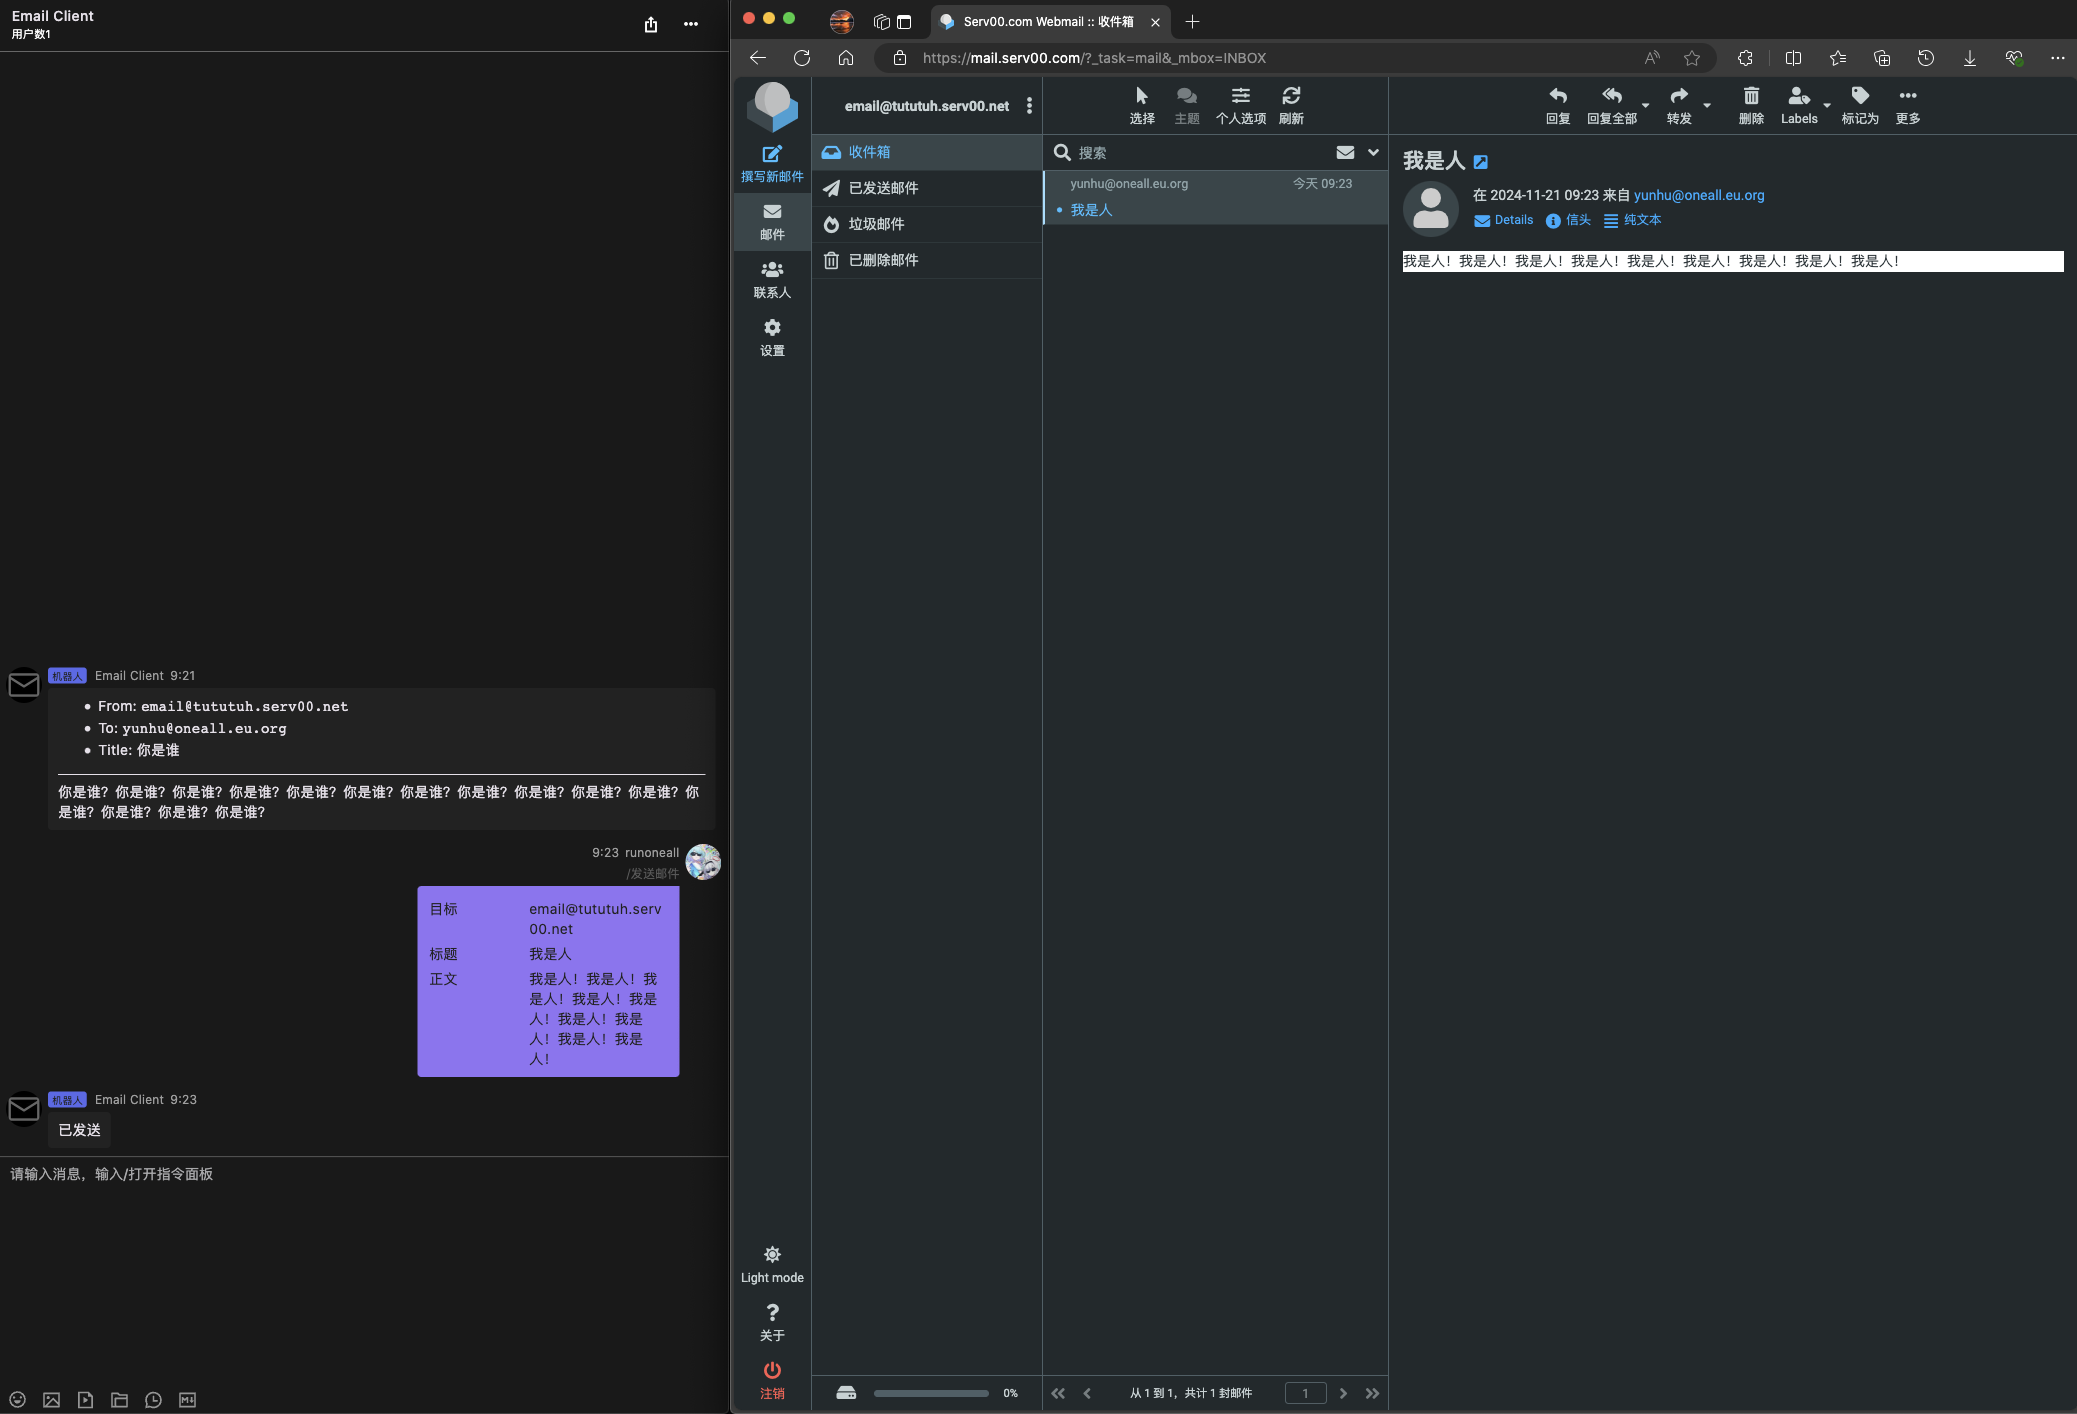
2024-12-02 18:43:22先上效果图
不局限在云湖,任何有收发消息API的即时通讯软件都可以部署
收消息
- 使用Cloudflare Worker部署
- 到电子邮件那里新建worker,再新建地址,选择转发到worker,选中刚刚创建的worker
- 因Cloudflare限制,必须使用wrangler开发(网页编辑器无法导入包)
- 使用wrangler创建项目,名字与刚创建的电子邮件worker相同
- 进入项目并安装postal-mime包
- 到云湖控制台中新建机器人
在 wrangler.toml 里写入如下变量
[vars]
YH_BOT_TOKEN = "换成你的云湖机器人Token"
YH_USER_ID = "换成你的ID"
然后编写代码:
import PostalMime from 'postal-mime';

async function toYunhu(msg, env) {
    const token = env.YH_BOT_TOKEN
    const apiUrl = 'https://chat-go.jwzhd.com/open-apis/v1/bot/send?token='+token
    const response = await fetch(apiUrl, {method: "POST",
        headers: {"Content-Type": "application/json; charset=utf-8"},
        body: JSON.stringify({
            recvId: env.YH_USER_ID,recvType: 'user',
            contentType: 'html',content: {text: msg}})})
    return response.json()
}

export default {
	async email(message, env, ctx) {
		let email_string = ``;
		const email_from = message.from;
		const email_to = message.to;
		email_string += `<ul><li>From: <code>${email_from}</code></li><li>To: <code>${email_to}</code></li>`;
		const email_content = await PostalMime.parse(message.raw);
		const email_subject = email_content.subject;
		let email_text = email_content.html;
		if (email_text == null) {
			email_text = email_content.text;
		}
		email_string += `<li>Title: <code>${email_subject}</code></li></ul><hr>${email_text}`;
		await toYunhu(email_string, env);
	},
};
最后使用wrangler部署
发消息(这一章节较为复杂!)
- 新建一个普通worker用于发送邮件
- 无需wrangler
- 准备 Github REST API Token(用于调用markdown转html接口)
- 准备 Resend Email Token(用于发送邮件)
- 将域名解析到Resend(可选)(如果想用域名邮箱则必须)
打开云湖控制台并新建自定义输入指令
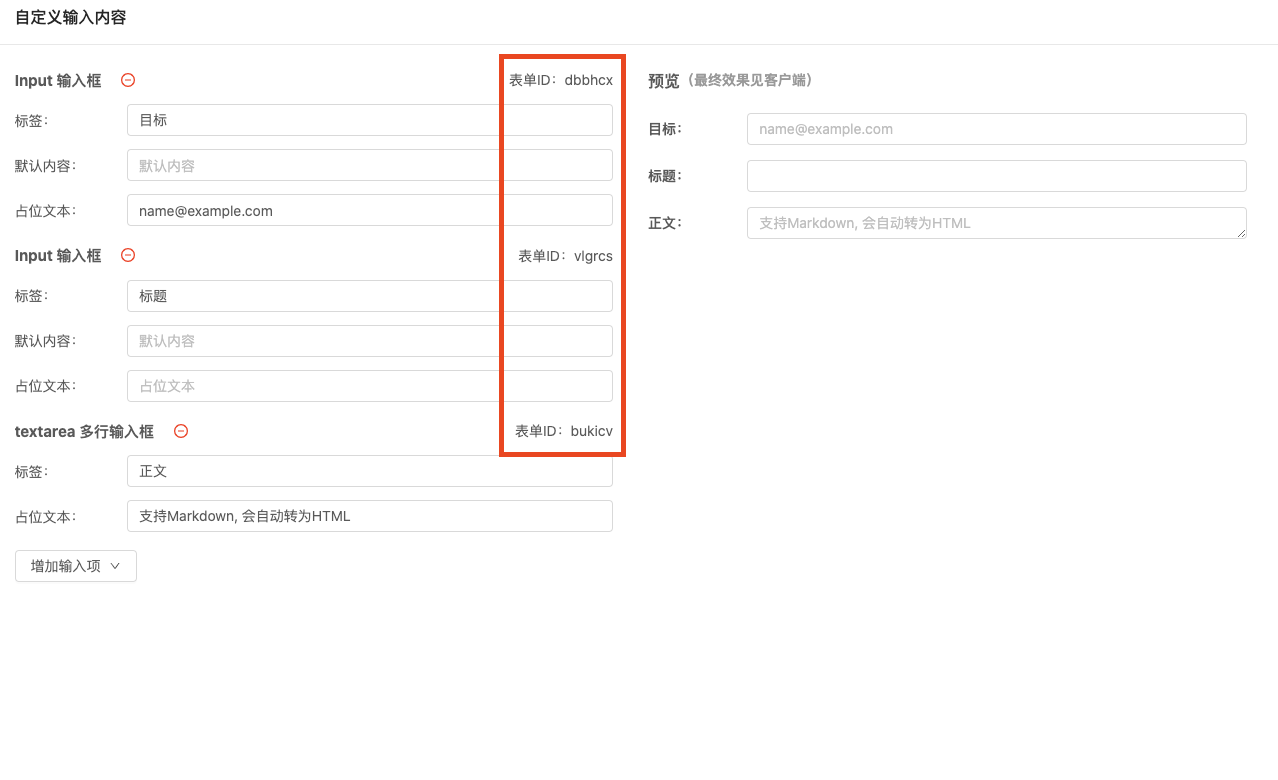
把每个表单ID对应的输入框名记下来!
打开cloudflare网页编辑器并编写代码
async function sendEmail(email_to, email_title, email_content, env) {
    const token = env.RESEND_EMAIL_TOKEN
    const response = await fetch("https://api.resend.com/emails", {
        method: "POST",
        headers: {
            "content-type": "application/json",
            "Authorization": `Bearer ${token}`
        },
        body: JSON.stringify({
            from: "这里填入你的resend邮箱名,如果将域名解析到resend则可以填域名邮箱",
            to: email_to,
            subject: email_title,
            html: email_content
        })
    });
    return response.body;
}

async function toYunhu(msg, env) {
    const token = env.YH_BOT_TOKEN
    const apiUrl = 'https://chat-go.jwzhd.com/open-apis/v1/bot/send?token='+token
    const response = await fetch(apiUrl, {method: "POST",
        headers: {"Content-Type": "application/json; charset=utf-8"},
        body: JSON.stringify({
            recvId: env.YH_USER_ID,recvType: 'user',
            contentType: 'html',content: {text: msg}})})
    return response.json()
}

async function toHTML(markdown, env) {
    const token = env.GH_REST_TOKEN
    const response = await fetch("https://api.github.com/markdown", {
        method: "POST",
        headers: {
            'Accept': "application/vnd.github+json",
            'User-Agent': "Markdown-To-Html-App",
            'Authorization': `Bearer ${token}`,
            'X-GitHub-Api-Version': "2022-11-28"
        },
        body: JSON.stringify({text: markdown}),
    })
    return response.text();
}

async function getEmailInfo(yhJson) {
    let email_info = {}
    const formJson = yhJson['event']['message']['content']['formJson']
    email_info['address'] = formJson['这里是 目标 输入框的表单ID']['value']
    email_info['title'] = formJson['这里是 标题 输入框的表单ID']['value']
    email_info['content'] = formJson['这里是 正文 输入框的表单ID']['value']
    return email_info
}

export default {
    async fetch(request, env, ctx) {
        if (request.method == "POST") {
            const email_info = await getEmailInfo((await request.json()))
            const address = email_info['address']
            const title = email_info['title']
            const content = await toHTML(email_info['content'], env)
            const email_response = await sendEmail(address, title, content, env)
            await toYunhu("已发送", env)
            return new Response(email_response);
        }
    },
};
在 worker设置 -> 变量和机密 那里新建变量
- GH_REST_TOKEN:你的Github REST API Token
- RESEND_EMAIL_TOKEN:你的Resend Email Token
- YH_BOT_TOKEN:你的云湖机器人Token
- YH_USER_ID:你的云湖ID
部署完成
3
1
5
分享
0 回复
暂无评论
- 0

关注:567
文章:87
IT
加作者好友
牢鼠
推荐群聊
StellarYu
施工🚧
蓝点网
♿莫奈小屋-2025不贺新春♿
机场情报分享(原灵车漂移爱好者
关注:567
文章:87
IT
加作者好友
牢鼠
推荐群聊
StellarYu
施工🚧
蓝点网
♿莫奈小屋-2025不贺新春♿
机场情报分享(原灵车漂移爱好者
京ICP备20012521号-7 增值电信业务经营许可证:京B2-20210468
Copyright © 2025 北京九万智达科技有限公司